
How to create extra controller mappings for Project Lunar
This tutorial assumes you’ve already installed Project Lunar.
Prerequisites(*):
- Putty (Windows)
- FileZilla
- Project Lunar
- Notepad ++
- SDL2 Gamepad Tool
- POLYGAMe SMDcontroller test
- A cup of Tea
How to create the mapping
First open SDL2 Gamepad Tool with a controller plugged in you should see a window like this:
Notice how it says mapping available ignore that and click Create A New Mapping.
(The instructions are the same for Windows, Linux and Mac)

Use this picture as a reference:

Notice how A is on A but Y is on X this is how Project Lunar maps the controllers press what buttons correspond to the buttons in the reference image once you’ve done that highlight what I have highlighted below:
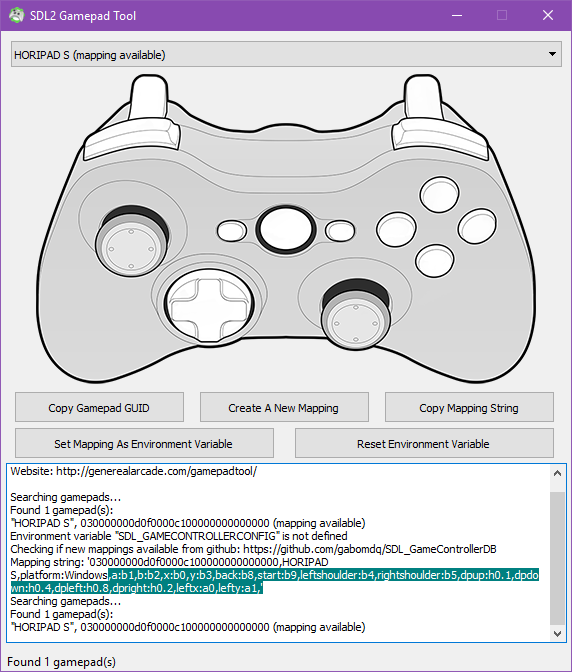
Note if you’re on Linux you can highlight the entire thing.
Copy that into Notepad++ you will need it for later what about the long string of numbers? If you’re on Windows or Mac ignore that you’ll get that from the MD mini.
Now plug in the MD mini your PC open up Putty or on Linux and Mac open a SSH client and connect to this IP address:
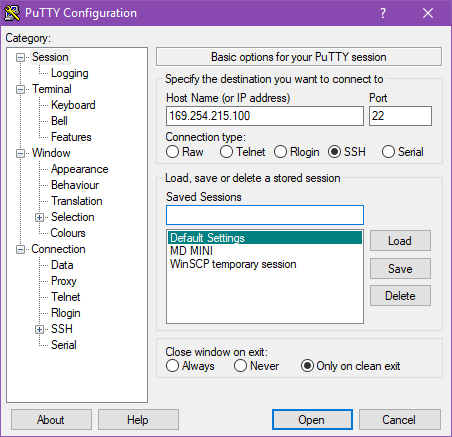
It’ll ask for a username it’s root once logged in you’ll see a window like this.
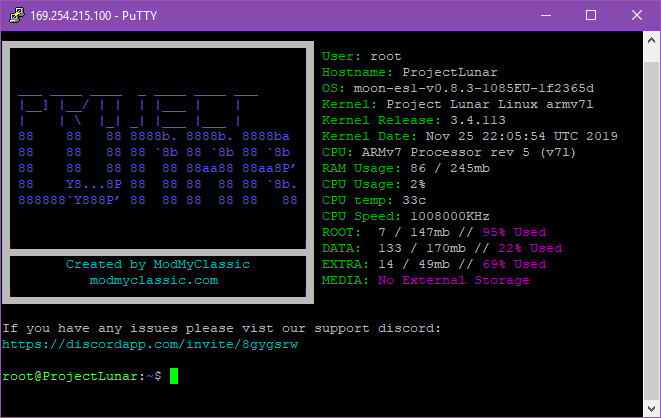
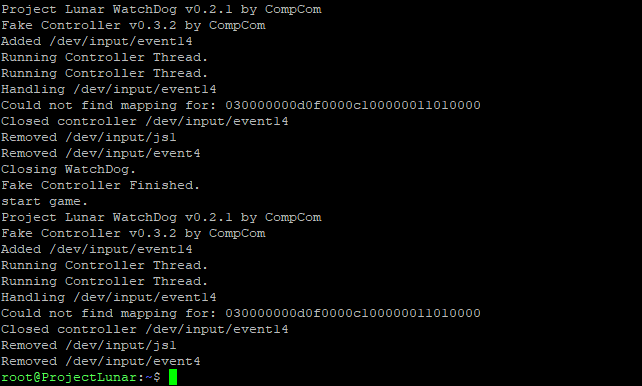
Type into the window cat /tmp/project_lunar.log, this will either show if the controller already has a config or it doesn’t and it’ll also show the GUID (The long string of numbers) Copy that string of numbers if you’re on Windows or Mac if you’re on Linux you don’t need too. In the event of it saying it already has one you cannot add the controller due to GUID conflict however if you find the controller is incorrectly configured you may delete the older config and make a new one.
Now with all the information open up the gamecontrollerdb.txt with Notepad ++ or any decent text editor copy the first line inside the gamecontroller.db like so:
![]()
Make a new line above that and paste the line you copied and now replace the GUID with the one you got earlier and change the name to your controller also. Note if you’re on Linux you can skip this and just make a new line and just paste save.
Now delete the current config for the new line and paste the one you made earlier except the platform:Linux, part that’s important once you’ve done that save and open up FileZilla or any FTP client that supports SFTP and goto this directory /opt/project_lunar/etc/boot_menu, and replace the gamecontrollerdb.txt
Reboot the MD mini and sync over the POLYGAMe SMDcontroller test rom using the Project Lunar Game Manager once synced plug in the controller you’ve configured into the first USB port open up the POLYGAMe test rom it’ll look like this once loaded:
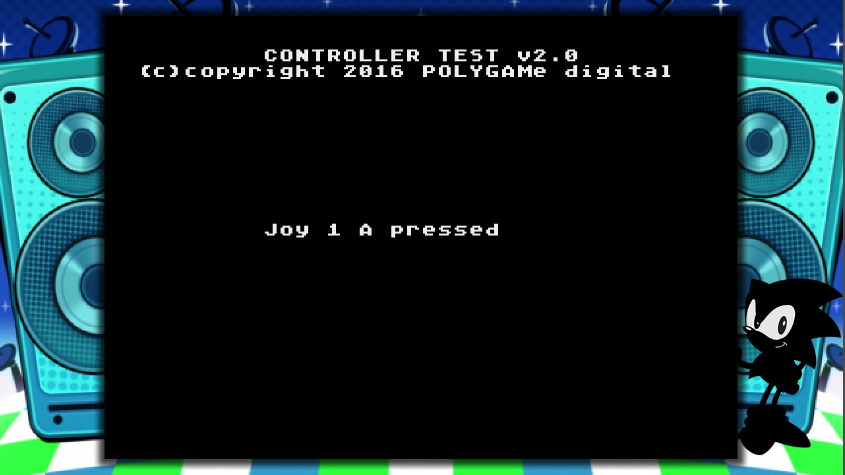
Now test the buttons on the controller if they’re wrong you’ve made a mistake if it’s correct then congrats! You’ve configured the controller correctly.
How to submit a controller config?
Whilst we don’t have a proper submission form please submit an issue here with the prefix of [CONFIG-SUB]
Making a config for RetroArch?
For configuring the controller Goto:
Settings > Input > Port 1 Binds
Use this picture as a reference:
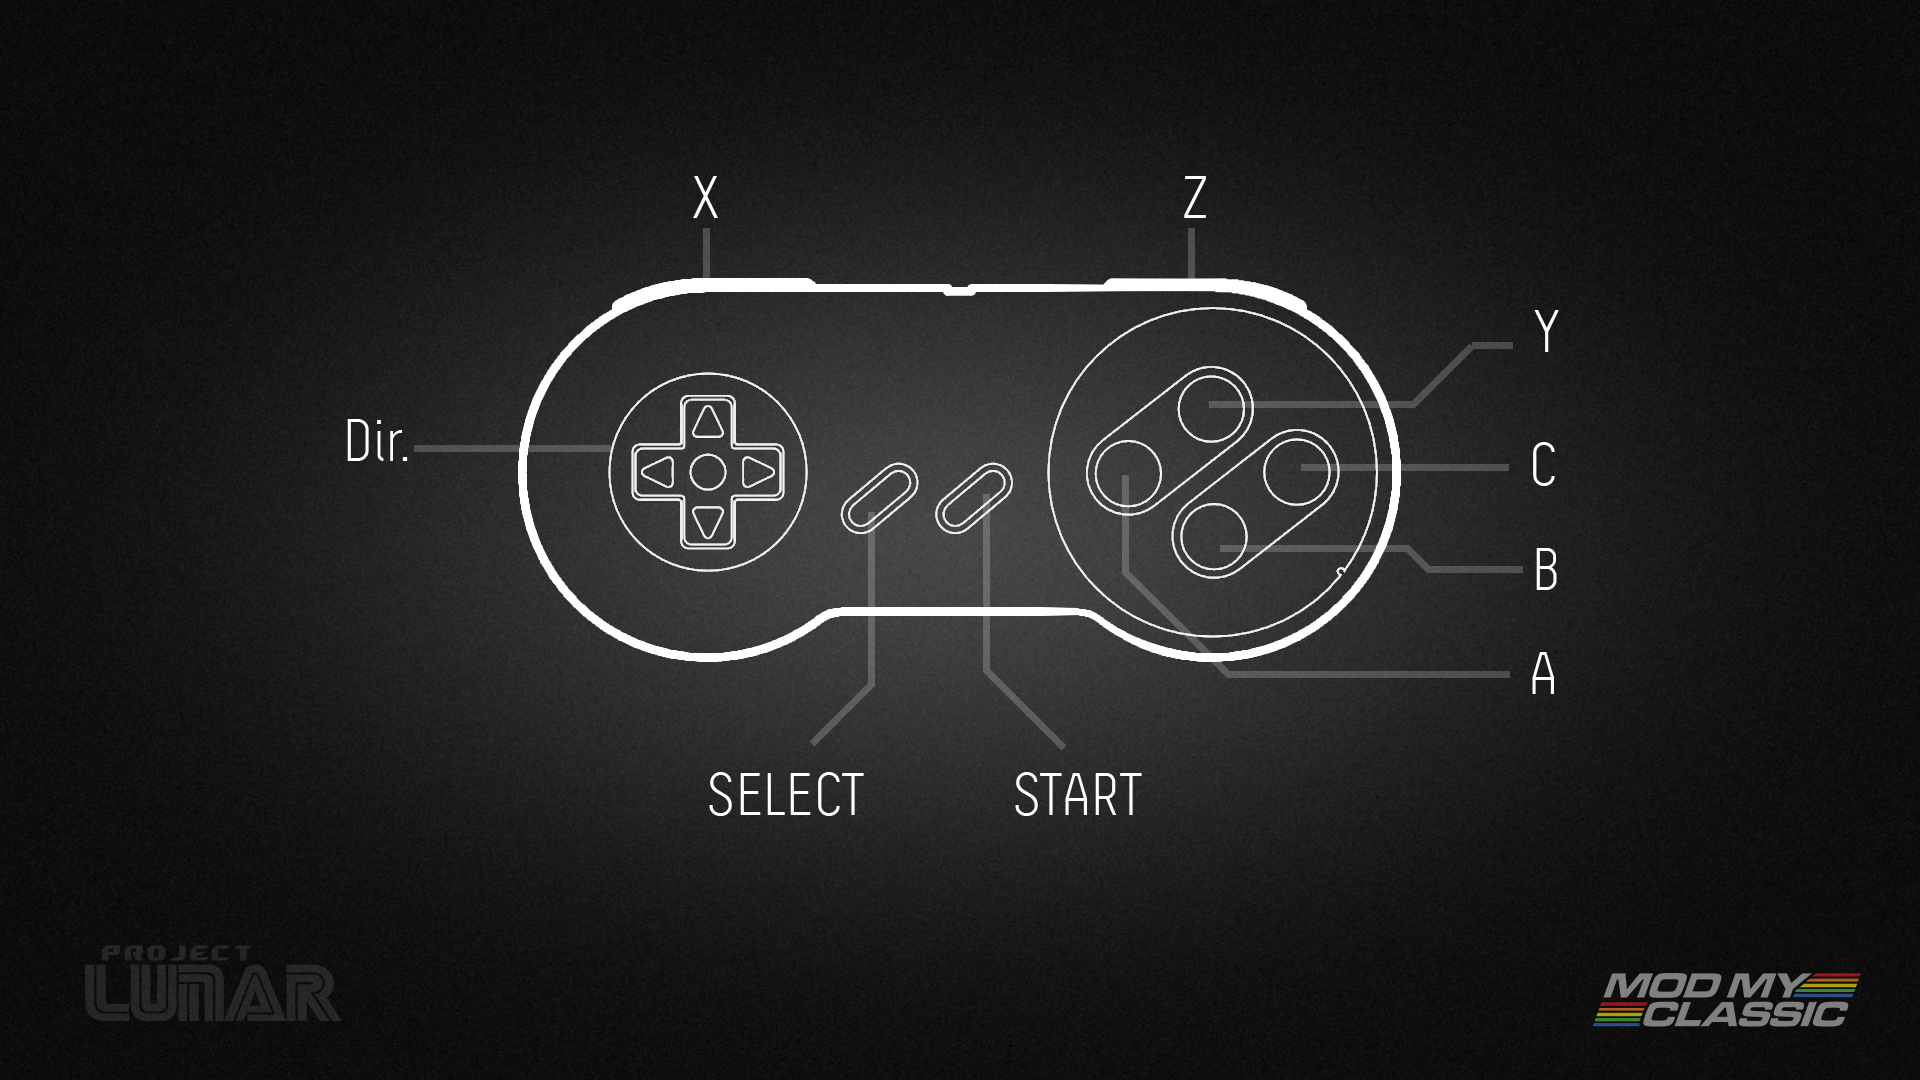
Notice how it’s a SNES pad, this is how RetroArch maps their controllers. Press what buttons correspond to the diagram above and after you’ve done that, select:
Port 1 Save Autoconfig
Open up Filezilla or an FTP client that supports SFTP and go to this location /rootfs_data/project_lunar/retroarch/autoconfig/udev transfer the newly saved config to your PC and submit it here with the prefix of [RA-CONFIG-SUB]
Need any help?
Message me at AyanamiRei0#3362 you can find me in the ModMyClassic Discord.