

Bluetooth Tutorial
Prep Work
- You must make sure that you boot into Project Eris and enable the Bluetooth option in the boot menu settings screen.
- Ensure you connect your Bluetooth adapter AND your Project ERIS Drive to your consoles front ports.
- If you have a Wifi Adapter, you can ignore the above step and plug your Bluetooth adapter into your OTG/USB HUB along with your Wifi, ensure your Wifi is configured, and copy the IP address on the Project ERIS wireless menu.
- You need to make sure you have PuTTY or another program that can launch it, like WinSCP.
Instructions
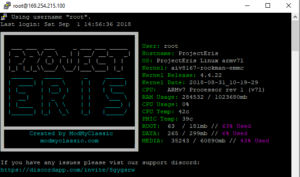
- Connect your Console to your PC with a USB to micro USB cable capable of data transfer, such as the one that came with the console. Open your SSH software like PuTTY, and connect to your console using the settings listed on the main Project ERIS page.
- If you use OTG and Wifi, you can leave your set up as it is, and substitute the IP address for the one you noted from the Wireless menu from your console earlier. You should see the Project ERIS logo in PuTTY when connected to the console.
- Enter “bluetoothctl”. You should be presented with a new dialogue.
- Enter “power on” – It should say “changing power on succeeded”
- Enter “agent on”
- Enter “default-agent” – It should say “request successful”
- Enter “discoverable on”
- Enter “scan on”
- Put your Bluetooth Game Controller into pairing mode. See the documentation on your specific controller for how to do this.
- If successful, you should see a dialog onscreen that says [new] followed by your controllers information. Copy the 12 digit code (xx:xx:xx:xx:xx:xx), this the MAC address of the controller. If you have multiple Bluetooth devices in your home at one time, you’ll need to ensure you’re connecting to the right one.
![]()
- Enter “pair” followed by the MAC Address. You should get a new dialogue that says “Pairing successful”
- Enter “trust” followed by the MAC Address of your controller from before.
- Your controller is now paired!
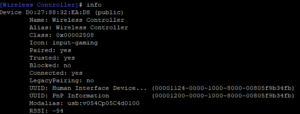
- Enter “info” while connected to your Controller to see the information of your specific controller. You should see Paired:Yes and Trusted:Yes.
- You can enter “quit” to input any further commands, or you can just exit PuTTY.
- Now your controller is paired and ‘trusted’, you should be able to re-pair with your console after it has booted to the Boot Menu.
Other Information
- PS3 and Wii U Pro Controllers don’t currently pair properly, since they use a different pairing method.
- If you pair your controller with another console, like its original console, or a different machine, you will need to enter these instructions again to re-pair it.
