
How to Install Project Lunar
Please note this tutorial is available in interactive form when you select install within Project lunar!
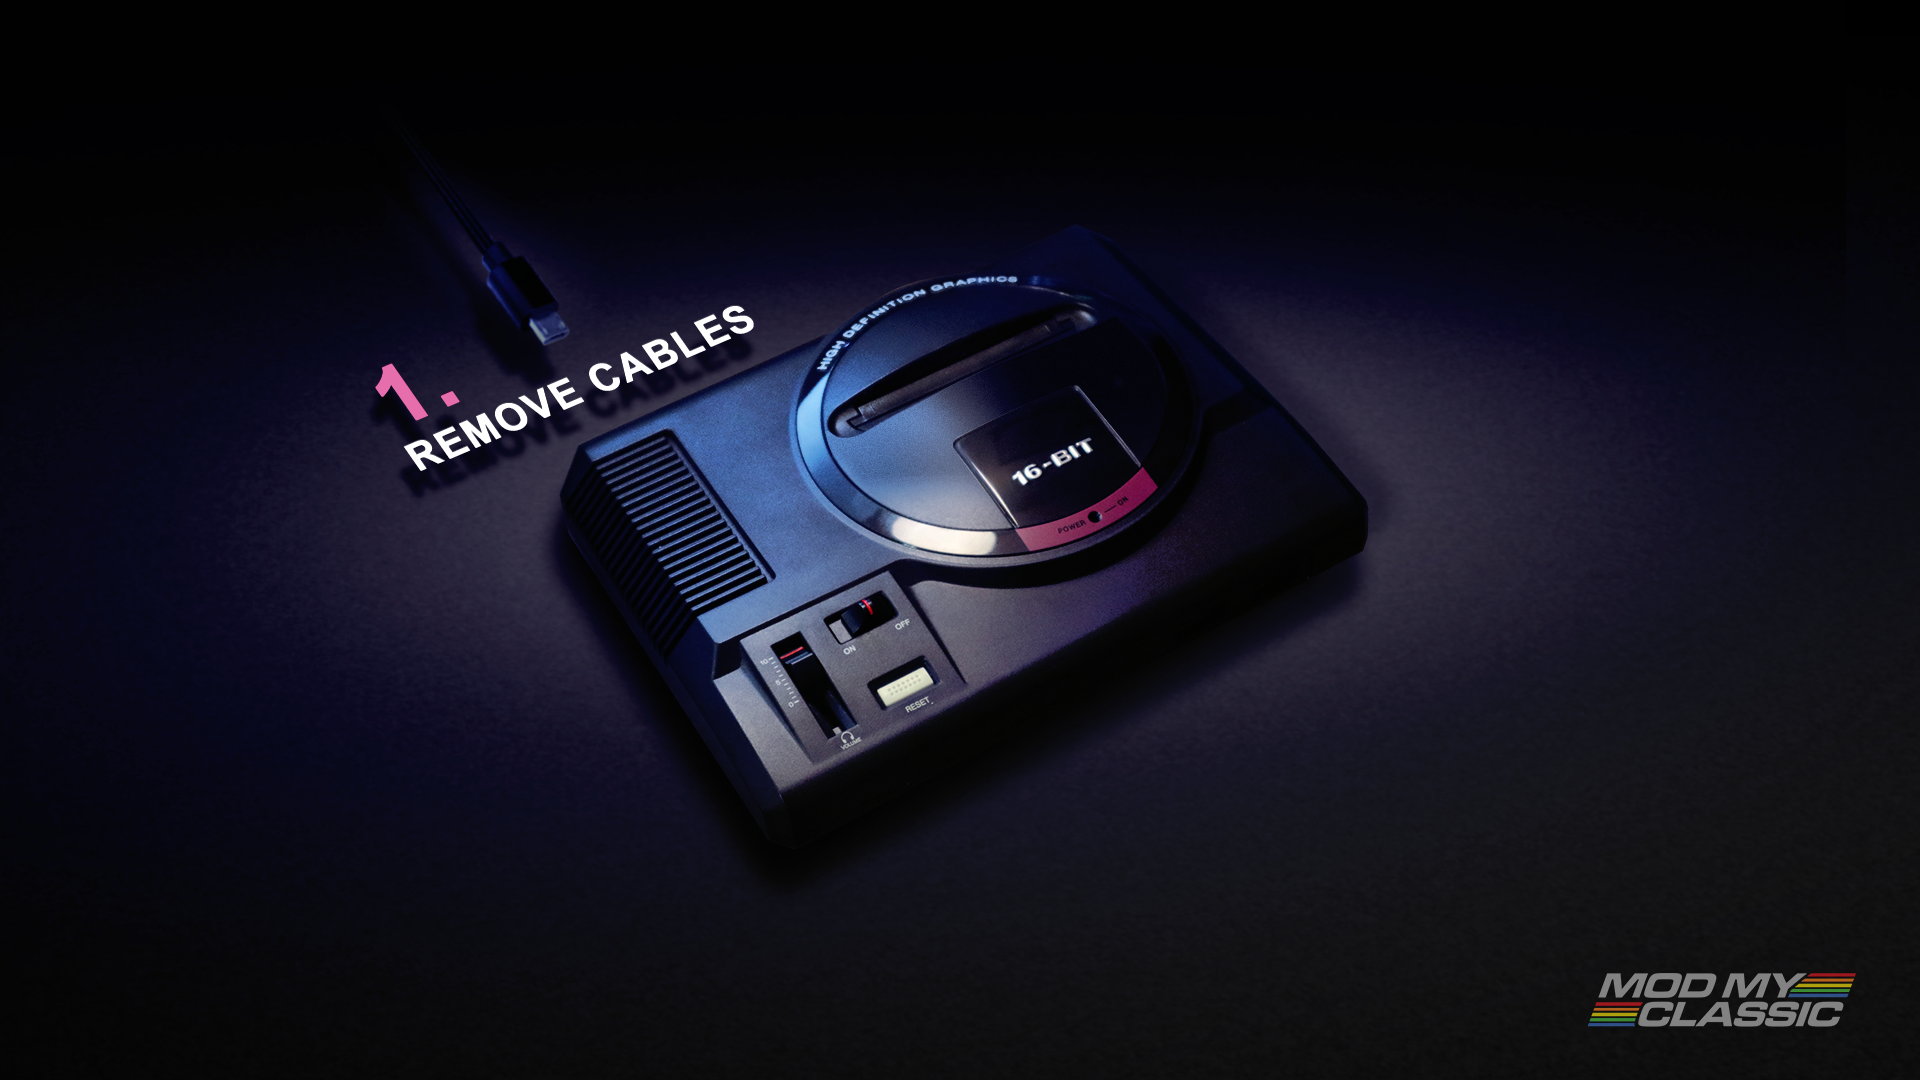 STEP 1: Remove all cables from console.
Make sure you have a micro USB cable with data lines (The bundled SEGA cable does NOT work!)
 STEP 2: Ensure Power switch is in the on position
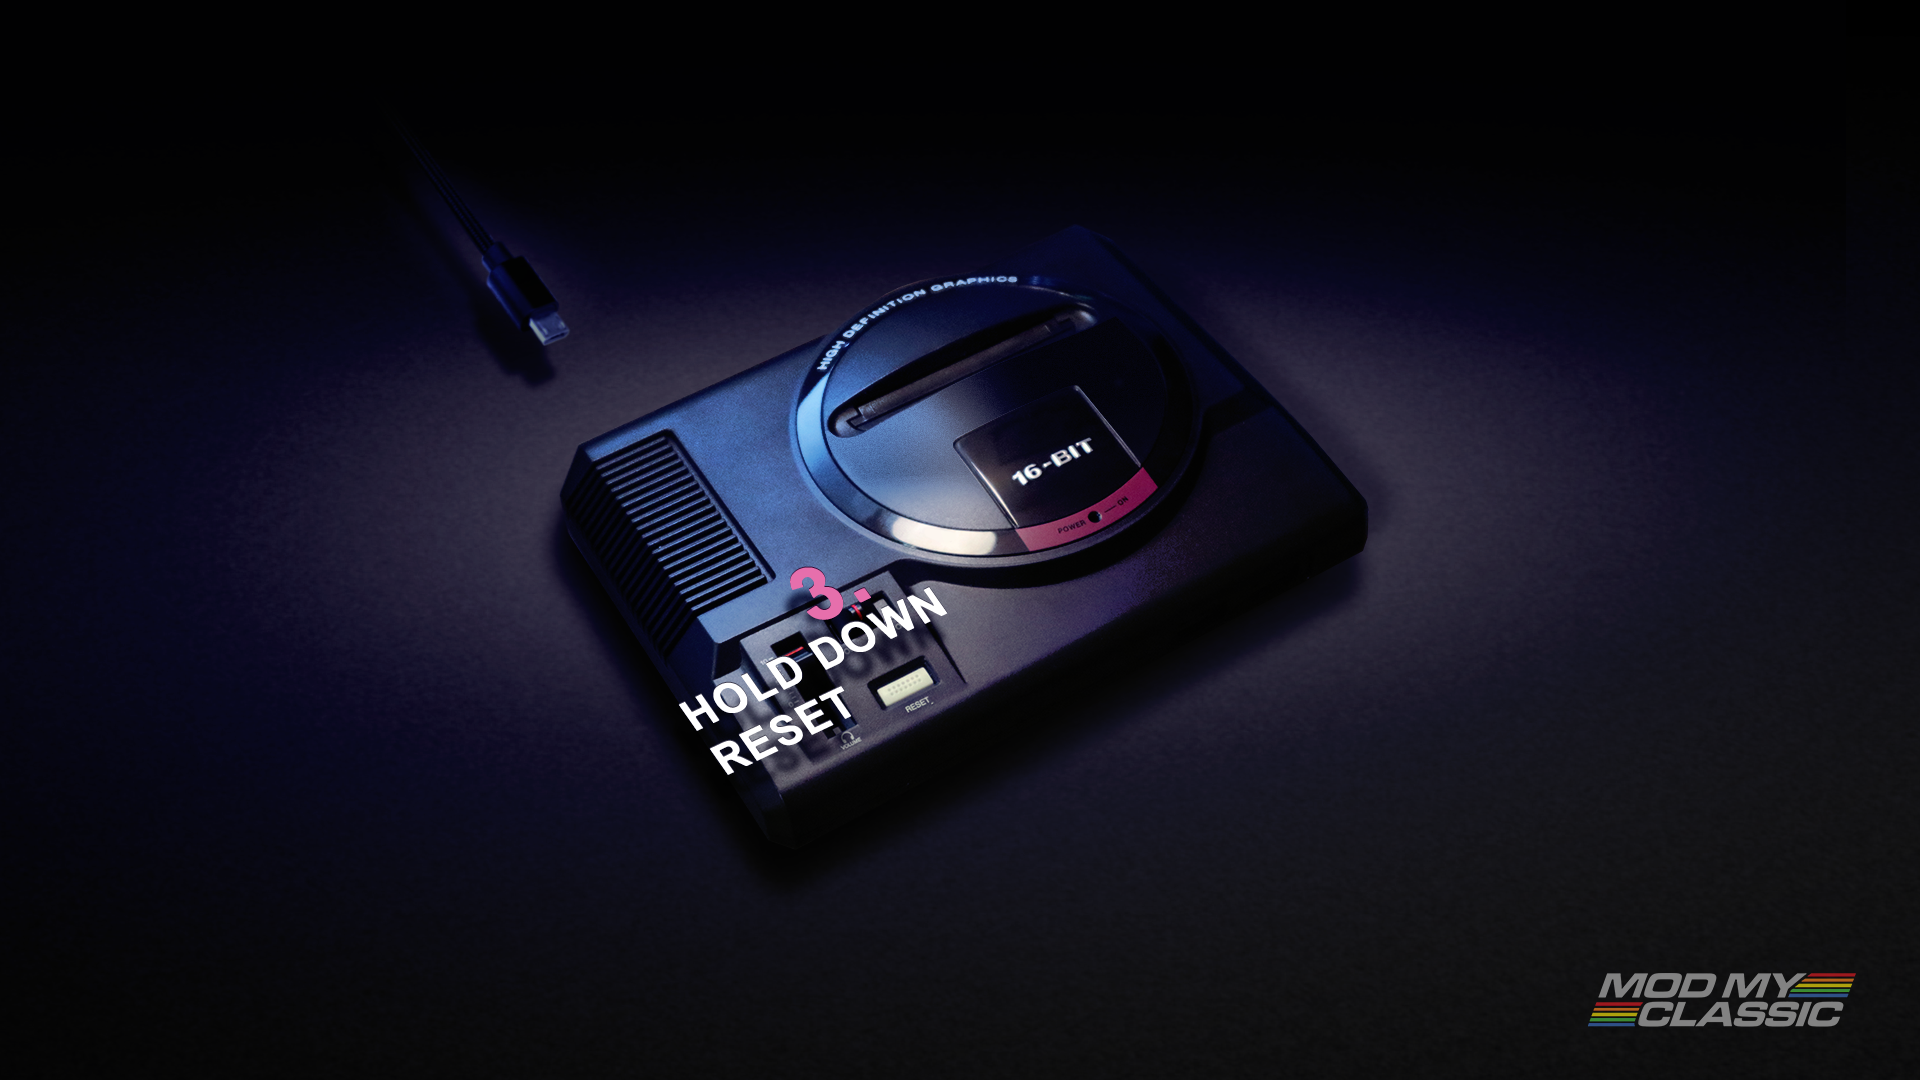 STEP 3: Hold down the RESET button
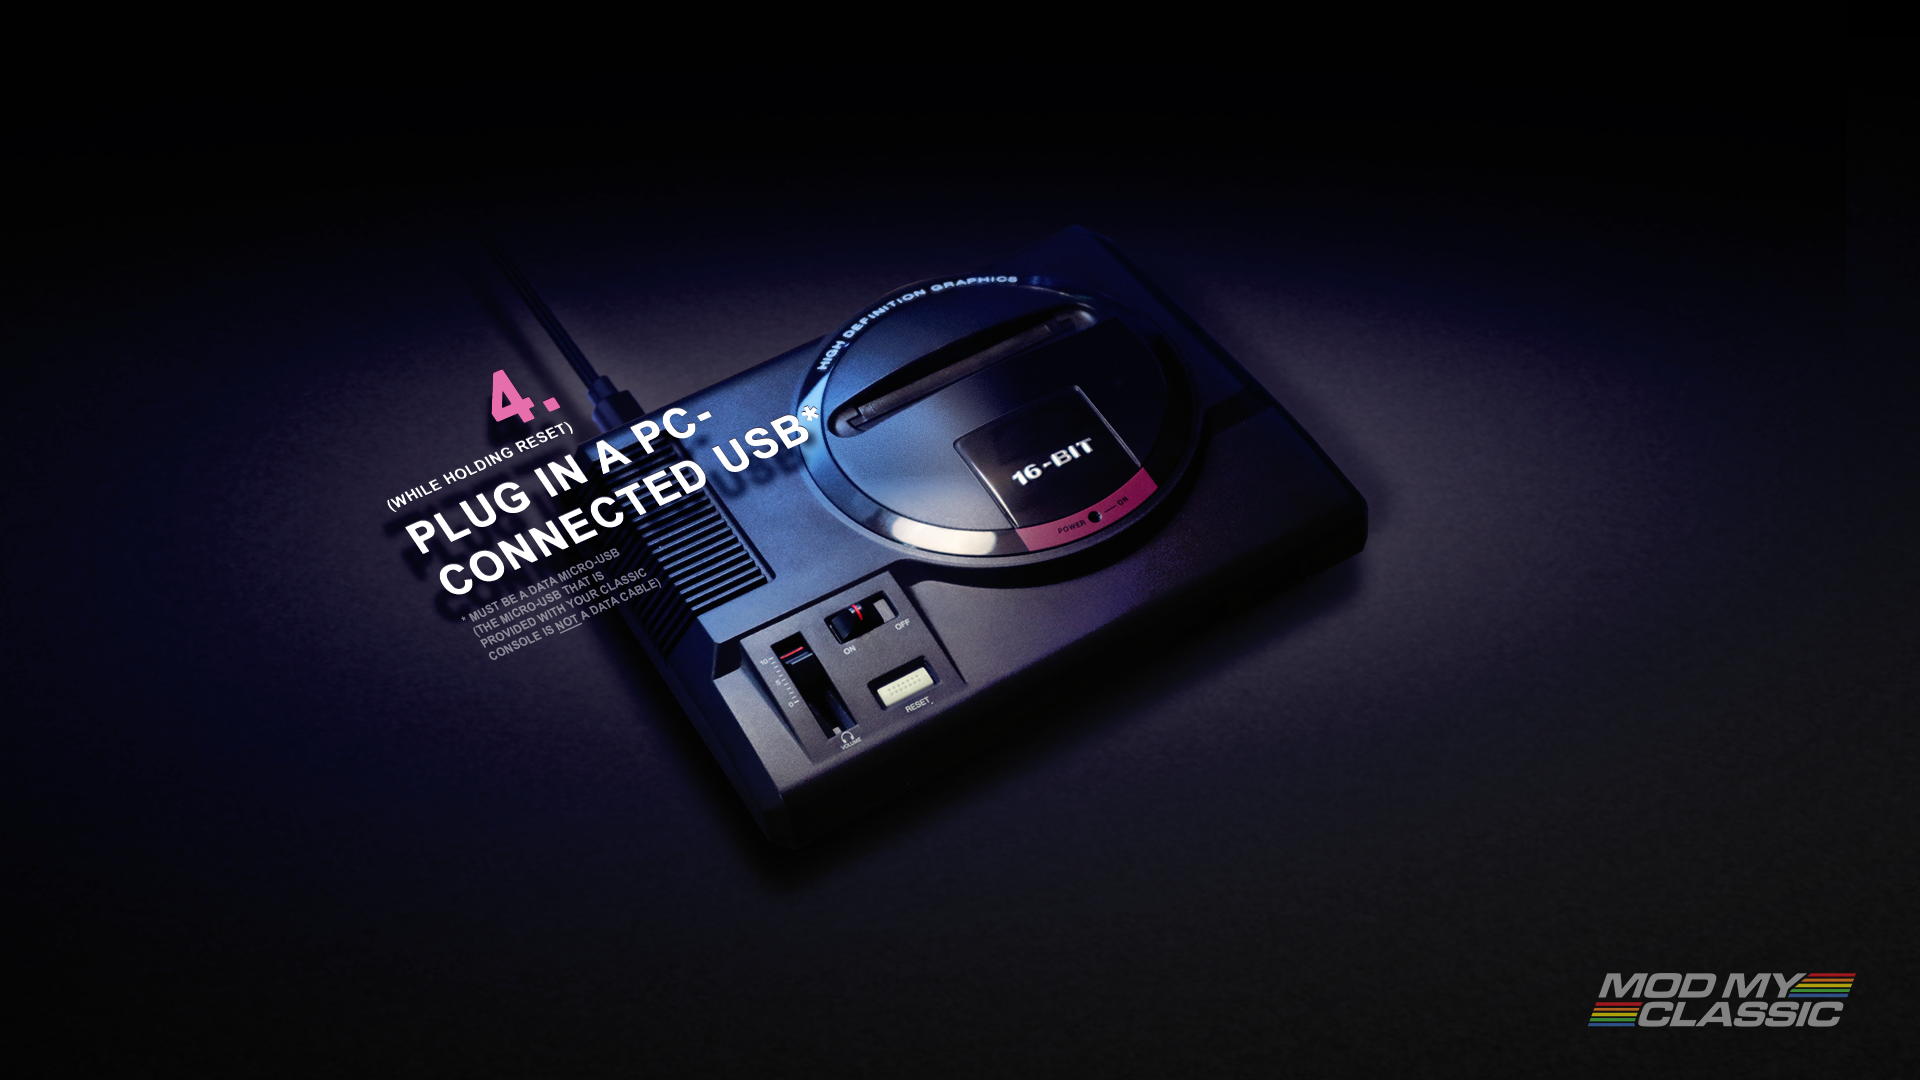 STEP 4: (Whilst holding RESET) Plug in the PC-connected USB to your console
(Must be a data enabled micro-USB cable. The bundled SEGA cable will NOT work!)
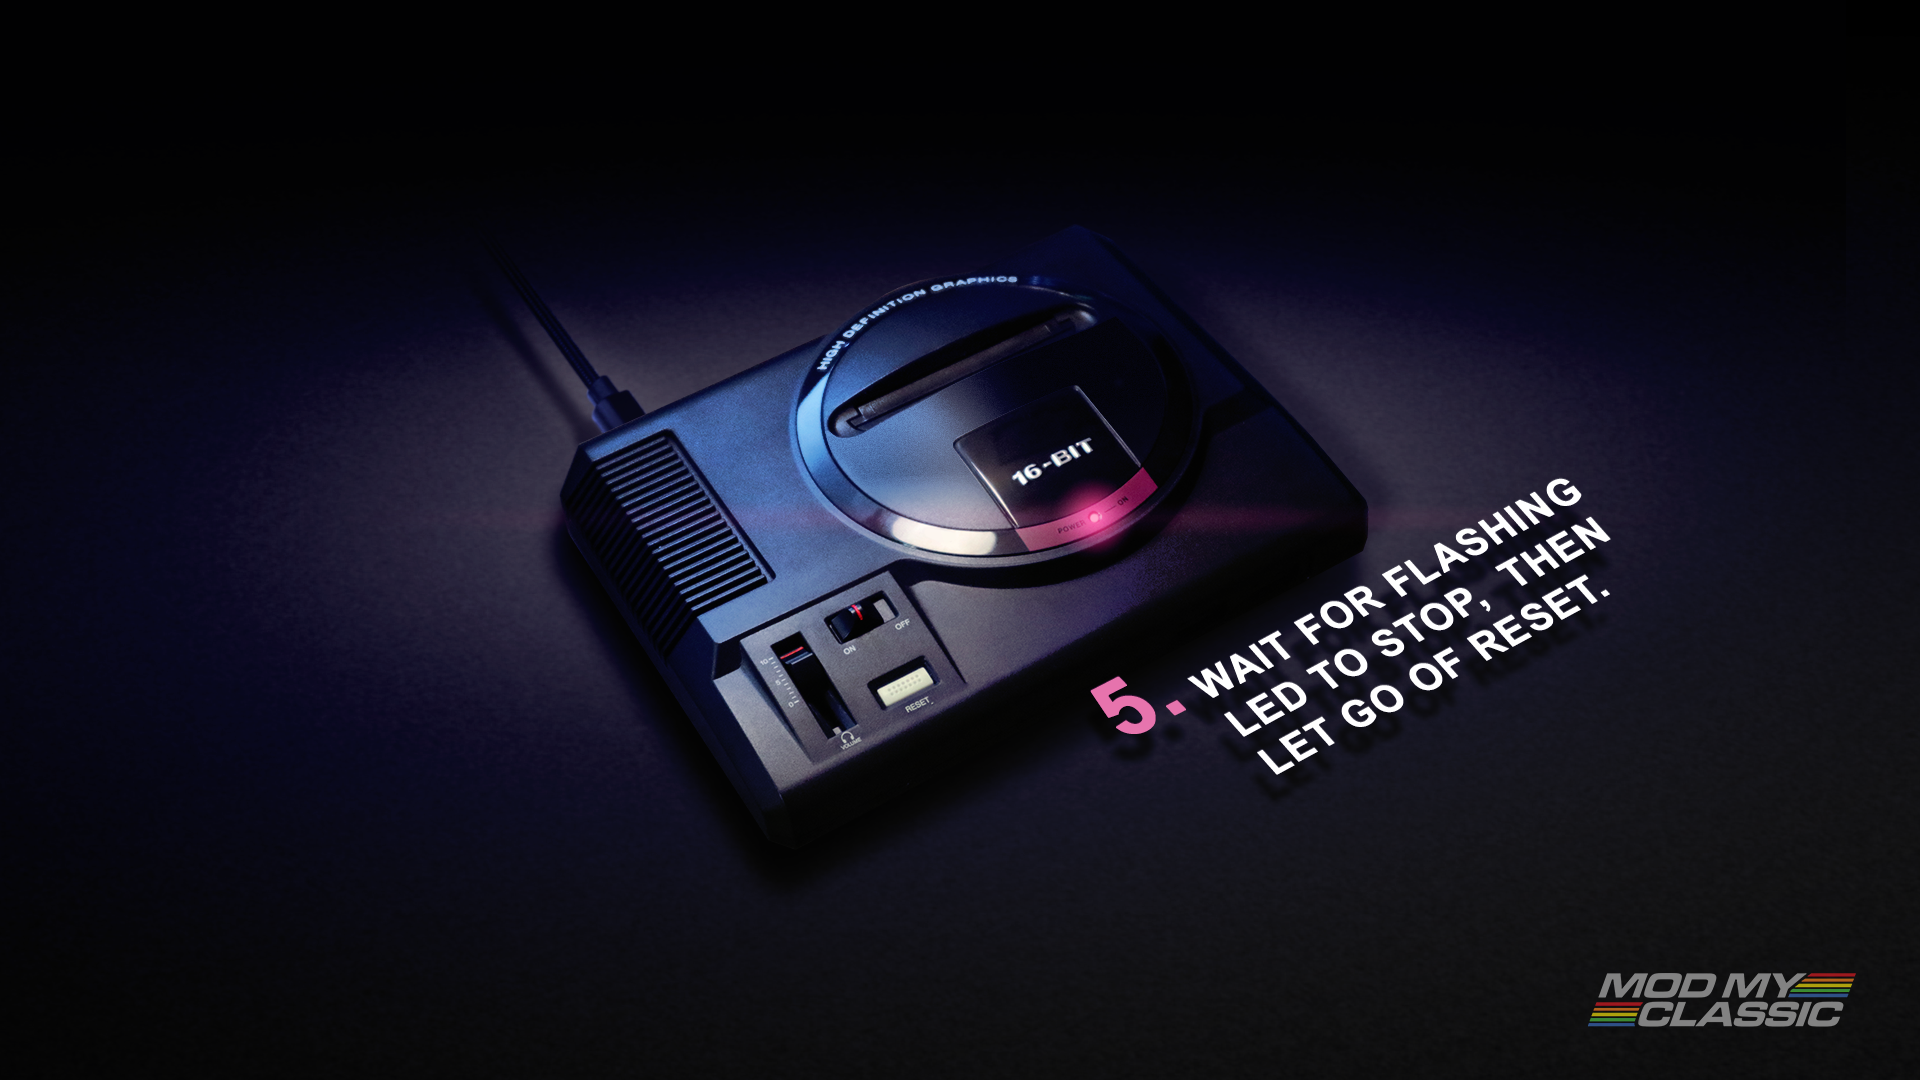 STEP 5: Keep holding RESET, the LED will flash off and back on. Once the LED has flashed back on you can let go of RESET after a second or so.
The install process will now begin and progress will be shown in the install window. It will take approximately 10 minutes
Whilst this process is underway. We highly suggest you check out “How to use Project Lunar (basics)” and the FAQ